Difference between revisions of "MOD Web GUI User Guide"
Jesseverhage (talk | contribs) |
Jesseverhage (talk | contribs) |
||
| Line 83: | Line 83: | ||
{| class="wikitable" style="text-align:center;" | {| class="wikitable" style="text-align:center;" | ||
| − | ! X !! Footswitch !! Knob !! MIDI Learn | + | ! X !! Footswitch !! Knob !! MIDI Learn |
|- | |- | ||
! Bypass/Toggle | ! Bypass/Toggle | ||
Revision as of 14:26, 28 November 2016
This chapter describes the graphical user interface (GUI) that is used for installing and removing plugins, setting up your pedalboards and banks, sharing pedalboards and more.
Contents
- 1 Accessing the GUI
- 2 Bottom bar
- 3 Pedalboard builder
- 4 Pedalboard library
- 5 Banks
- 6 Plugin store
Accessing the GUI
In order to access the GUI, the MOD Duo needs to be hooked up to your device(*), either through USB or through Bluetooth.
Follow the steps below to access the GUI.
(*) the device can be anything that has access to a web browser, and has a USB host port, or Bluetooth connectivity. We recommend using a PC or laptop, because the interface is not yet optimized for smaller screen sizes.
USB
- Power up the MOD Duo
- Connect the USB-B port of the MOD Duo to a USB port on your device
- Open your favorite browser, and navigate to 192.168.51.1
Bluetooth
- Power up the MOD Duo
- Make the Bluetooth connection
- Open your favorite browser, and navigate to 192.168.50.1
Bottom bar
The bar at the bottom of the web interface allows you to:
- Navigate to different sections of the web interface: use the buttons on the left
- From left to right: pedalboard builder, pedalboard library, banks, plugin store
- Add/remove MIDI devices: click the "MIDI PORTS" button
- Bypass the effects chain for each individual input: click the bypass buttons
- Monitor the CPU and RAM usage
- Keep your MOD Duo up to date: hover over the rightmost button
Pedalboard builder
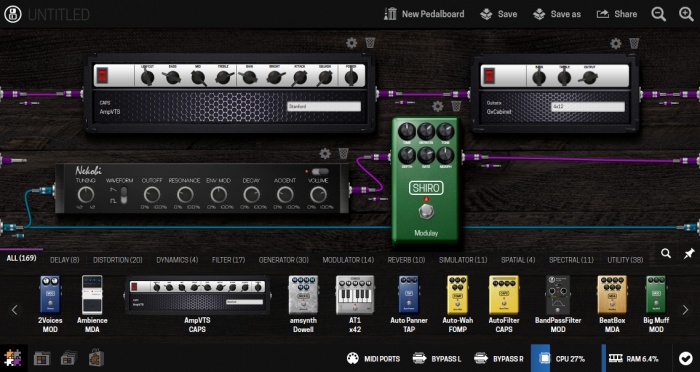
Inputs and outputs
The inputs can be found on the left side of the interface, the outputs can be found on the right side of the interface. The signal flow goes from left to right.
The top two inputs are the physical audio inputs on your device. The other(*) inputs on the left side are the MIDI devices that you have added, together with the DIN-MIDI in port that is always shown.
Likewise, the top two outputs are the physical audio outputs of your device. The other(*) outputs on the right side are the MIDI devices that you have added, together with the DIN-MIDI out port that is always shown.
(*) hover over the input/output to see to which MIDI device it belongs.
Plugin descriptions
In order to see a brief overview of the plugin controls, as well as a short description of what the plugin does, simply click on the respective plugin in the bar at the bottom of the screen.
Adding/removing plugins to/from your pedalboard
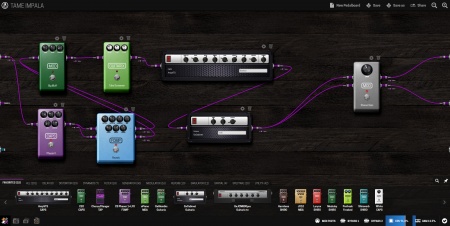
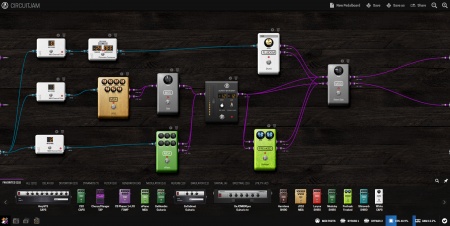
Adding a new plugin to your pedalboard is very intuitive, simply select a plugin from the bar in the bottom of the screen, then drag and drop it onto the wooden background and connect it. The canvas will automatically resize when you drag a plugin to the edge of the display.
To remove a plugin, simply press the garbage bin icon in the upper right-hand side of the plugin. This will also remove the connections to that plugin.
Making/removing connections
The MOD Duo has different types of cables that can be connected to different ports:
- Purple for audio
- Blue for MIDI
- Orange for CV
Connections can be made starting from signal sources (your inputs on the left or the outputs of plugins) to signal inputs (your outputs on the right, or the inputs of plugins)
Click, hold and drag the plug to the desired input port, and a connection is made.
You will notice that even after a connection has been made, you can still make more connections from the same output. The same goes for the inputs, you can connect as many outputs as you want, to a single input. Experiment and come up with the craziest ideas!
To remove a connection: click, hold and drag the plug away from the input, the connection will disappear immediately.
Accessing plugin configuration screen
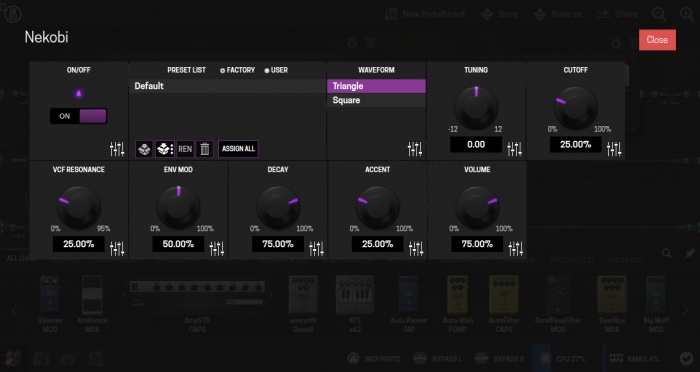
In case you want to tweak the different parameters that are not directly shown in the interface, create presets for the plugin or set up physical controls for changing parameters (actuator mapping), you need to access the plugin configuration screen.
Simply press the gear icon in the upper right-hand side of the plugin to enter the configuration screen.
Setting up actuator mapping
- Press the fader icon next to a parameter in the plugin configuration screen
- Select an actuator(*) from the drop-down list and press save
- If "MIDI Learn" was selected, send the desired MIDI command, it will be detected by the system
Now you can test the actuator mapping. The parameter is now greyed out, and unable to be changed through the web interface, you have successfully mapped an actuator!
(*) the actuators can be mapped to parameters based on the following matrix:
| X | Footswitch | Knob | MIDI Learn |
|---|---|---|---|
| Bypass/Toggle | Yes | No | Yes |
| Trigger | Yes | No | Yes |
| List | Yes | Yes | Lists with 2 values |
| Value | Tap Tempo parameters | Yes | Yes |
If you would like to dive in further, click "ADVANCED", and more options will show up
- Enter the label that you would like to be displayed on the displays of the MOD Duo
- Enter the range that you want the mapped actuator to sweep within, inverted ranges are also possible by setting the first parameter higher than the second parameter
- Set the sensitivity (amount of steps from minimum to maximum) of the actuator from the dropdown menu
Setting up and using plugin presets
TODO: explain routine, etc
Saving your pedalboard
In the bar on the top there are two buttons that you can press to save your pedalboard.
- Press the "Save" button for saving to the current pedalboard while keeping the same name
- Press the "Save as" button for saving the current pedalboard with a different name
Sharing your pedalboard
In the bar on the top there is a button named "Share" which allows you to share your current pedalboard with the world!
Press the button, fill in the small form and press the "Just share" button if you want to share your pedalboard without a sound-sample.
Alternatively, press the record icon to start recording a short sound segment. Once you are done, the "Just share" button will have changed to "Share", press it to finalize the process.
Auto update
When an update becomes available for the MOD Duo, a message pops up from the icon in the bottom-right of the screen, prompting you to update your device. Simply press the "Get update" text, and the process will start.
Pedalboard library
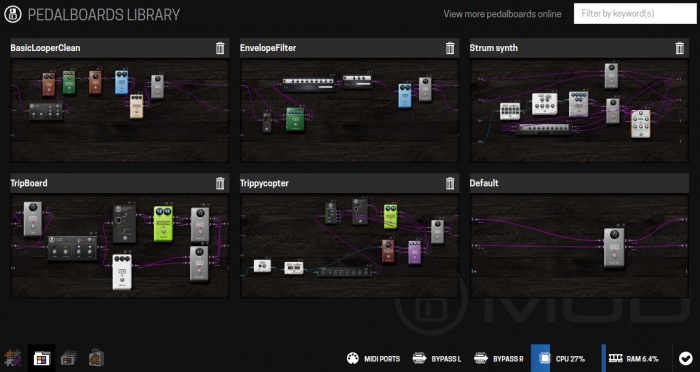
This screen shows all the pedalboards that are currently saved on the device. Simply click on a pedalboard to make it the active pedalboard.
You are also able to remove the boards that you no longer use from the device by pressing their respective bin icons.
Banks
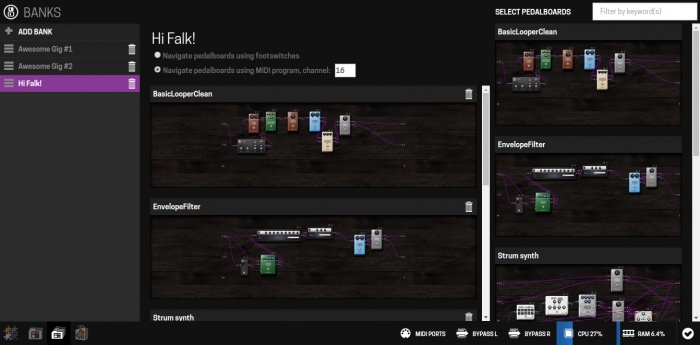
In the banks window you can manage your collection of banks (groups of pedalboards).
Creating a new bank
- Press "ADD BANK"
- Enter a name for your new bank
- Choose your means of navigation
- Add the pedalboards that you want
- Put them in the order that you want
You can cycle through the pedalboards in the bank in two ways:
- Using the footswitches on the MOD Duo: left footswitch is previous, right footswitch is next pedalboard
- Using MIDI program changes: enter the MIDI channel that you want to receive the program changes over. When sending a program change = N message, the Nth board in your bank will be loaded. For example, by sending MIDI program change = 1, the first board in your bank will be loaded.
Adding pedalboards
Adding pedalboards is easy, simply find the pedalboard you would like to add in the section on the right, and drag-and-drop it into the bank (the big empty space in the middle for empty banks).
Plugin store
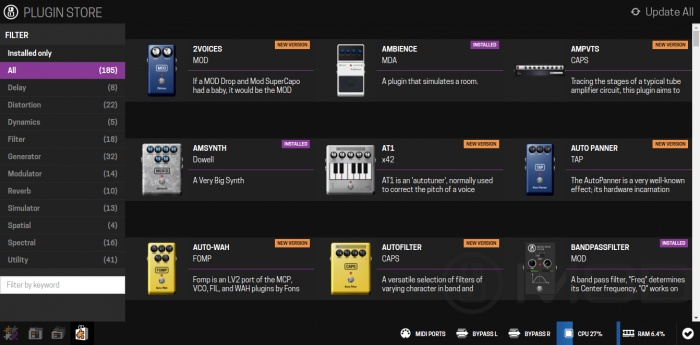
In the plugin store you can install, remove and update the plugins on your device.
Installing plugins
- Find the plugin you would like to install by browsing through the store
- Click on it, a popup will open
- Press the "INSTALL" button
- The plugin(*) will now be installed
(*) Some plugins come in bundles, installing one plugin from that bundle will install the complete bundle.
Updating plugins
- If an update is available, the plugin label that normally shows "INSTALLED" will change to "NEW VERSION"
- Click on the plugin, a popup will open
- Press the "UPGRADE" button
- The plugin will now be upgraded to the new version
There is also an "Update All" button at the top-right corner of the page, press this button to update all plugins that have new versions available.
Removing plugins
- Click on the plugin that you would like to remove, a popup will open
- Press the "REMOVE" button
- The plugin(*) will now be removed
(*) Some plugins come in bundles, removing one plugin from that bundle will uninstall the complete bundle.
