Difference between revisions of "Arduino Wireless tutorial"
Leogermani (talk | contribs) m (add credits) |
Leogermani (talk | contribs) m |
||
| Line 1: | Line 1: | ||
| + | [[Category:Arduino Shield Tutorials]] | ||
| + | |||
This tutorial will show you how we can make a wireless Control Chain device with the Arduino shield. | This tutorial will show you how we can make a wireless Control Chain device with the Arduino shield. | ||
Revision as of 23:28, 10 November 2018
This tutorial will show you how we can make a wireless Control Chain device with the Arduino shield.
Contents
WHAT DO I NEED?
- One Arduino Uno or Due
- One Arduino Control Chain shield
- Two serial Bluetooth modules
- One ATTiny 85
- One DIP8 IC socket
- A sensor you want to use
- Some Prototype PCB
- Some wire
- (Optional) Something to put your build in.
SCHEMATIC
The schematic for this build consists of 2 different modules.
Schematic for the receiver build:
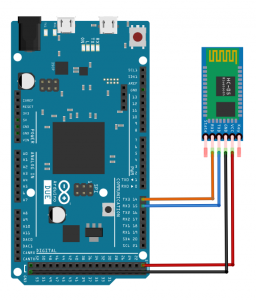
The schematic for the receiver is really straightforward. Just connect the Vin and GND of the Bluetooth module to the 5V and GND track on the CC shield. Then, connect the serial wires of the Bluetooth module to the Serial 3 port of the Arduino.
We do this because we need another hardware serial port. The reason we use a hardware serial port is that the interruption of the Control Chain library will cause problems with software serial libraries.
Schematic for the transceiver build:
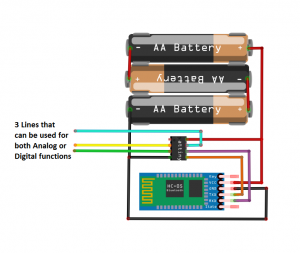
The schematic for the transmitter consists of 3 AA battery’s, an ATTiny 85, a HM-10 BLE module, and of course a sensor. The ATTiny will communicate with the HM-10 and the HM-10 will act as a wireless serial bridge. To power it all, we used three AA batteries summing up to 4,5V which is perfect for this application.
This setup leaves us with 3 available pins to use as digital I/O. The reset pin can also be used as I/O as long as you don't pull it down to ground (or too close to ground). So, for example, you could use it for analog input but you have to keep it in a voltage range that is far enough above 0V so it won't cause a reset.
USING BLUETOOTH MODULES
Depending on what Bluetooth modules you're planning to use, the next few steps may vary.
For this prototype, I'm using some HM-10 modules, which can be programmed with AT commands. This can be done with any serial interface connected to the Rx and Tx of the HM-10. To keep things simple, I used the same Arduino Due that we are going to use later on.
You can connect the serial 0 port of the Arduino to the serial port on the Bluetooth module and communicate with it through the Arduino’s IDE serial monitor.
First, you will need to query the native MAC address by sending "AT+ADDR?". The module should return something like: OK+COND43639BBE467. In this case, the MAC address is D43639BBE467. You should first get the MAC address of both modules before continuing.
After that, you can make the modules connect. Let's say we have module A and B. Send “AT+CON[address]” to module A with the MAC address of module B filled in and vice versa. The last thing is to send AT+ROLE0 to one and AT+ROLE1 to the other (for this application it doesn’t matter which one is master or slave).
THE ATTINY 85 CODE
The ATtiny code consists of nothing more than an analog.Read() function for the sensor value and a Serial.write function to send the data to the Arduino.
To upload the code to the ATTiny you can use your Arduino as done in this tutorial.
ARDUINO RECEIVER CODE
The code of the Arduino is pretty straightforward and consists of the needed Control Chain configurations, a Serial read function to read the given values and a little bit of scaling so our values fit nicely in our set range.
THE BUILD
- Solder the opamp feet on the prototype PCB
- Solder the pin-header for the Bluetooth module on the prototype PCB
- Wire your sensor to the ATTiny and wire the modules as shown in the schematic
- Place the ATTiny and the Bluetooth module
- Solder the pin-header for the other Bluetooth module on the Control Chain Arduino shield
- Place the other Bluetooth module on the Arduino.
UPLOADING THE CODE
- Follow the instructions on our Github page and install the dependencies
- Upload the code to your Arduino
- Follow this tutorial to upload your code to the ATTiny 85
- Program your Bluetooth modules as explained above.
All done, time to test!
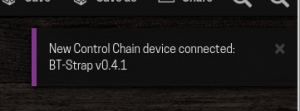
Connect the CC shield to your MOD DUO. If everything went well you should see a new CC device popping up.
Success!
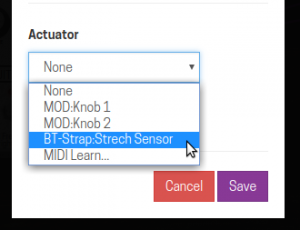
Turn on the ATTiny 85 and HM-10, wait for the modules to connect (the LED on both modules should stop blinking) and assign the CC device to the actuator of your choice.
Address it like any actuator on the GUI
All done! You should have a working wireless Control Chain setup.
Now you may ask yourself why would I even need a wireless setup for Control Chain? Well, we found that it is extremely useful with a wide variety of sensors. For instance, we made one with an accelerometer like this:
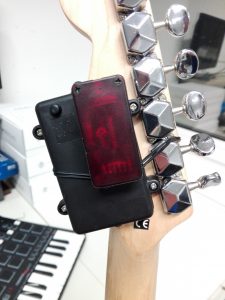
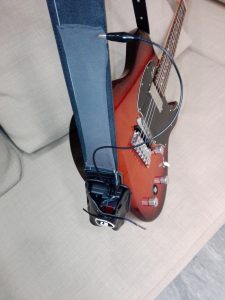
Another example of where we used this build is to make a stretchable guitar strap. Using this setup and a piece of conductive fabric like the one seen here.
Our wireless guitar strap stretch sensor:
Note: This tutorial was originally published by Jesse Verhage at the Mod Devices blog
