Difference between revisions of "Arduino LiquidCrystal tutorial"
Leogermani (talk | contribs) (adding images) |
Leogermani (talk | contribs) m (add credits) |
||
| Line 76: | Line 76: | ||
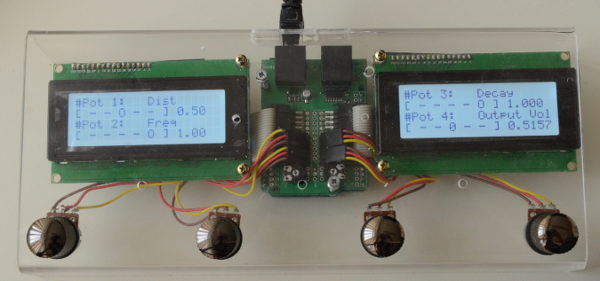
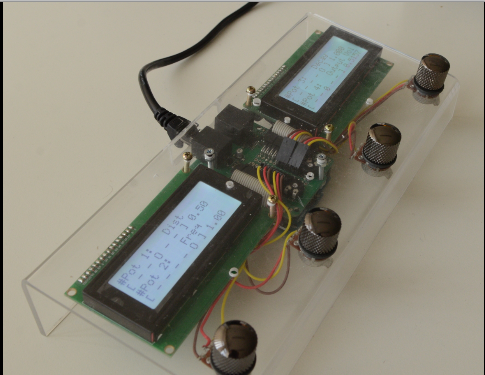
The 4 extra potentiometers controller with the 2 LCD screens looking good! | The 4 extra potentiometers controller with the 2 LCD screens looking good! | ||
| + | |||
| + | Note: This tutorial was originally published by Jesse Verhage at the [https://www.moddevices.com/blog/2018/01/15/tutorial-liquidcrystal-and-control-chain Mod Devices blog] | ||
Revision as of 23:17, 10 November 2018
This tutorial answers a question posted to the forum asking whether it would be possible to use LCDs on your Control Chain device and with the Control Chain library version 0.5.0 and up, it now is!
Contents
WHAT DO I NEED?
- One Arduino Uno or Due
- One Arduino Control Chain shield
- Two 4x20 LCD Screens
- Four 10K linear potentiometers
- Some wire
- Some soldering tin
- Pin headers (recommended)
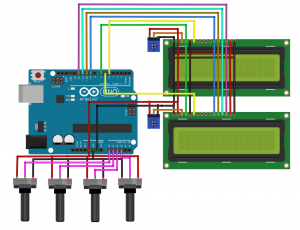
SCHEMATIC
The schematic for this build looks a little complicated, but most of the connections are used for the displays.
Note that in the schematic there are two 16x2 displays used. The code, however, is meant for two 20x4 displays. Nonetheless, the pin-out is the same in both cases.
To keep this blog post from being extremely long, here is a link to a more detailed description of the wiring of the LCD screen’s made by Adafruit.
Because we are connecting 2 displays instead of one, we can connect almost all pins from one display to the other. For the contrast pin, however, it is still recommended to use 2 different potentiometers. The reason for this is that the 2 displays are almost never the same. This way it is still possible to set the contrast individually.
The big difference between this schematic and the one from the Adafruit tutorial is the ‘enable’ line of the displays (pin 6). In the Adafruit tutorial, this pin is connected to Arduino pin 8. In our case, however, we connect the ‘enable’ pin of the first display to Arduino pin 5 and the ‘enable’ pin of the second display to Arduino pin 6. Also, 4 potentiometers are connected. By default, they are connected to A0, A1, A2, and A3. But this is easily changeable, if desired.
THE CODE
For ease of use, the LiquidCrystal library was used. This library makes writing to the LCDs a lot easier. There is, however, a downside to this approach. This library is rather slow and uses a lot of delays internally. Because of this, the example code will only work with the Control Chain library version 0.5.0 or up. As it is right now, this library is only compatible with the Arduino Uno. This is due to the UART interruption that by default cannot be used on the Arduino Due. A while ago a Pull request was opened to change this. If you really want to use an Arduino Due, scroll a little down on the Control Chain library Github page where you can find an explanation on how to do this.
The code is structured in such a way that it mostly depends on the Control Chain Callbacks. Whenever a value or assignment changes, the display will be updated as well. The values of the potentiometers are simply read by an analogRead() function.
THE BUILD
Wire up the LCD screens according to the schematic (either by soldering them directly or as recommended with the use of pin headers)
Connect the potentiometers outer pins to +5V track and GND track of the CC shield
Solder the potentiometers inner pin to the corresponding analog input of the CC shield (by default A0, A1, A2, A3)
UPLOADING THE CODE
Follow the instructions on our Github page and install the dependencies then upload the code to your Arduino.
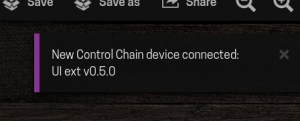
All done, time to test! Connect the CC shield to your MOD DUO. If everything went well you should see a new CC device popping up:
Control Chain device on MOD GUI Success!
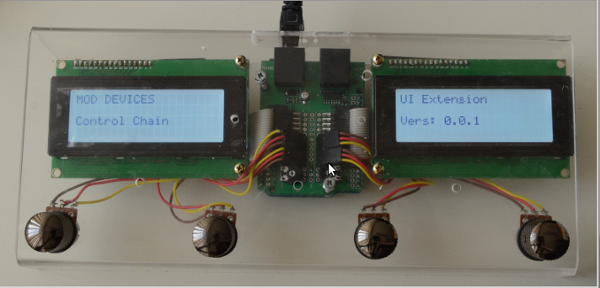
Also, when powered on, the device should display a message like this:
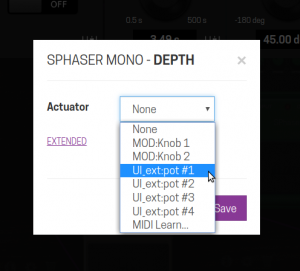
Then, assign the CC device to the actuator of your choice:
Address it like any actuator on the GUI
After assigning, the device should look like this:
The screens show the assigned parameters
All done! You should have yourself a working Hardware UI extender.
THE FINAL PRODUCT
You can also put your build in an enclosure. For me, that meant looking up old prototypes and again I reused one of the XF4 prototype enclosures.
The 4 extra potentiometers controller with the 2 LCD screens looking good!
Note: This tutorial was originally published by Jesse Verhage at the Mod Devices blog
