Difference between revisions of "MOD Duo User Guide"
Jesseverhage (talk | contribs) |
Jesseverhage (talk | contribs) |
||
| Line 7: | Line 7: | ||
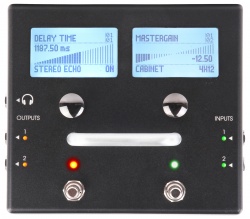
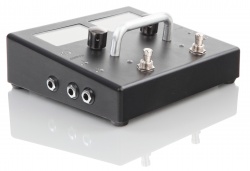
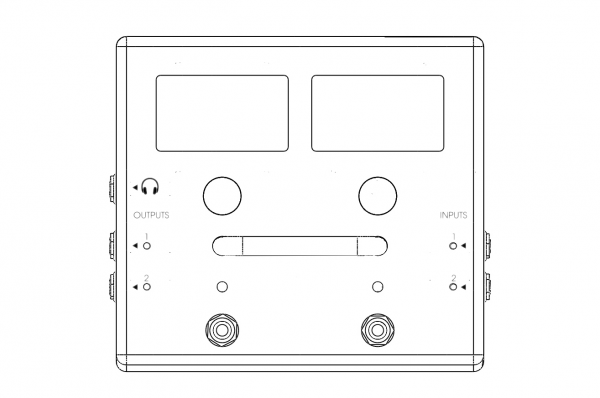
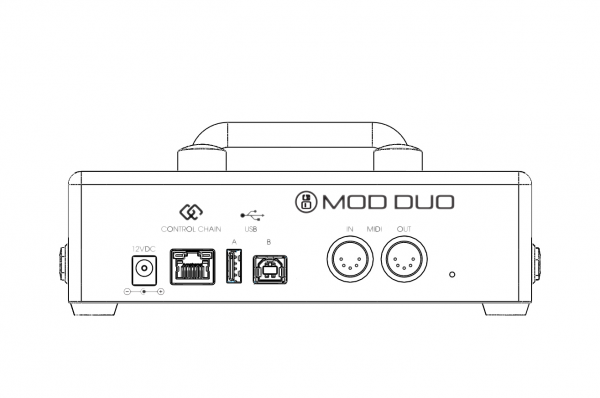
The wireframe images below expose the controls and inputs/outputs that the MOD Duo has. | The wireframe images below expose the controls and inputs/outputs that the MOD Duo has. | ||
| − | [[File:device_wireframe_top.png|600px|thumb| | + | [[File:device_wireframe_top.png|600px|thumb|none|Wireframe of the top-view, exposing the two footswitch-LED-pairs, the two knobs, the two displays, the two inputs with peak-LEDs, two outputs with peak-LEDs and the headphone output]] |
| − | [[File:device_wireframe_back.png|600px|thumb| | + | [[File:device_wireframe_back.png|600px|thumb|none|Wireframe of the back-view, exposing the power supply input, ]] |
bla | bla | ||
Revision as of 18:41, 2 November 2016
This chapter describes the MOD Duo in high detail. You will find information about the physical device, the device menu and how to control it, and how to hook up the device in your setup.
Overview
The wireframe images below expose the controls and inputs/outputs that the MOD Duo has.
bla
Device features
Inputs and outputs
Actuators
Displays
The device menu, or as we call it, HMI (Human Machine Interface), allows you to change settings on the MOD Duo. It also allows you to access different banks, pedalboards and the tuner.
The device menu can be accessed by holding down the left knob for one second.
Navigation is done by rotating the left knob until the desired section is highlighted. Click on the left knob to enter the highlighted section.
When you are done, you can either navigate to "Back to SETTINGS" and click on the left knob to go back to the device menu. Or you can hold down the left knob for one second to exit without going back to the device menu.
Banks
If you want to use the MOD Duo without being connected to a computer, this is a very important section.
Upon entering this section, you will see the banks that you have created using the web interface, as well as a bank that contains all your pedalboards, named "All".
By navigating to a bank and clicking on the left button, you can browse the pedalboards within that bank. Navigate to the pedalboard of your choice and click the left button to load that pedalboard, and make the bank the currently active bank.
From this point onwards, you can use multiple ways of navigating through the pedalboards in the active bank:
- Repeat the procedure to navigate to and select a different pedalboard
- Use the footswitches on the MOD Duo to cycle through the pedalboards inside the currently active bank (only if set up through the web interface)
- Use MIDI program changes to select the currently active bank (only if set up through the web interface)
Current pedalboard
If you have made some changes to some parameters of your pedalboard, and you want to save those changes for the next time you load the pedalboard, you can enter this menu and select and click on "Save State". This is especially useful for use without a computer.
If you have made some changes, but you are not quite happy with the result, there is also a "Reset State" command. This command will return your pedalboard to the original saved state.
Volume and gains
This section allows you to set the gain for the inputs and level of the outputs. The headphone has its own section, so check out the "Headphone" section for information about the headphone volume levels and settings.
When you notice that the LED's at the input side are blinking bright red, that means that your input signal is "clipping". In general, that is not a desired condition. Luckily, it can easily be resolved by lowering the input gain. Try a different gain-stage for the clipping input, or use the "Fine Adjust" option to take smaller steps.
The gain stages represent the following input gain:
- Low: -22.0 dBu
- Medium: -9.5 dBu
- High: +3.0 dBu
For the outputs there is only a simple volume control, going from 0 (unity gain) all the way down to -127.0 dBu. It is recommended to keep the outputs set to unity gain, and resolving clipping on the outputs by reducing the gain in the pedalboard.
Headphone
In this section you can change the settings for the headphone output.
By entering the "Volume" sub-menu you can set the volume from -33dBu to +12dBu.
By enabling the "Direct monitoring" option, your headphone output will work as a monitor for the dry sound coming into the MOD Duo.
Bluetooth
This section allows you to check the status of, and set up your Bluetooth connection.
TODO: insert connection routine
NOTE: in order to use Bluetooth it is required to insert a Bluetooth dongle (version 3.0 or higher) in the USB A port of the MOD Duo.
Info
This section serves to give you information about the services running, the versions of the different pieces of software running on your MOD Duo, as well as the serial number attached to your MOD Duo.
Enter the "Services" sub-menu to see the activated services:
- jack
- mod-host
- mod-ui
- ttymidi
Enter the "Versions" sub-menu to see the versions of:
- release
- restore (hexadecimal)
- system (hexadecimal)
- controller (hexadecimal)
Enter the "Device" sub-menu to see the serial number of your MOD Duo.
Tuner
By holding down the right knob for one second, you will go into tuner mode.
Changing the input being tuned can be done by clicking on the right knob once. By default the tuner is set to tune input 1.
Exiting the tuner is done by holding down the right knob for one second again.
Hooking up the MOD Duo
The MOD Duo has two completely independant inputs and outputs, as well as support for regular DIN-MIDI as well as USB-MIDI devices. It quickly becomes clear that many different possibilities exist for hooking up the MOD Duo in your setup.
In general, there are two scenarios for hooking up the MOD:
- At setup time, with a computer connected to create new pedalboards
- For live use, possibly without a computer connected
For the first scenario, the only connection that you need to make is from the USB B port on the MOD Duo to your computer. (Bluetooth is possible in case that is preferred)
For the second scenario, it is possible to remove the connection to the computer completely, the MOD Duo works perfectly fine as a standalone device!
Wiring examples
In the sections below you can find examples of setups that use the MOD Duo, split up into different categories.
Guitar
TODO: Add typical use cases with guitar
- in front of single amp, as stompbox
- in front of, and in fx loop of single amp
- into PA, with amp+cabsim on mod
- semi-accoustic setup
Vocals
TODO: Add typical use cases with vocals
- MIC -> MOD -> DI -> PA
- ?
Keys
TODO: Add typical use cases with keys
- HW Synth -> MOD
- ePiano -> MOD
- keyboard -> MOD
MIDI
TODO: Add typical use cases with MIDI devices
- MIDI Keyboard/controller -> MOD -> OUT
- MIDI Keyboard/controller -> MOD -> HW Synth -> OUT
Exotic
TODO: Add exotic use cases
- Chapman stick
- Wind instruments
- Accoustic instruments


